
The text-behind-image effect is everywhere right now YouTube thumbnails where a creator's face overlaps bold type, Instagram posts where the subject stands in front of a word or phrase, Twitter/X visuals that stop the scroll mid-feed. It's a simple depth trick that makes flat graphics feel three-dimensional.
You can create this effect in Canva without Photoshop. If you want Canva's official tool page, use Canva Text Behind Image. This guide walks you through the exact steps, then compares Canva's approach with Text Behind Picture a tool built specifically for this effect so you can choose the right workflow for your needs.
What You Need Before You Start
- A photo with a clear subject (person, product, animal) against a reasonably distinct background
- A Canva account the background remover requires Canva Pro (free trial available)
- 10–15 minutes for your first attempt; under 3 minutes once you know the steps
How to Put Text Behind an Image in Canva: Step-by-Step
Step 1: Open Canva and Upload Your Image
Open Canva and create a new design or open an existing one.
- Go to the Uploads section in the left sidebar (desktop) or bottom toolbar (mobile)
- Click Upload files, select your photo, and Canva adds it to your library
- Drag it into your canvas and resize it to fill the frame
Step 2: Add and Style Your Text Layer
With your image placed, add text that will eventually sit behind the subject.
- Click Text in the left menu and add a heading
- Type your message short, bold phrases work best for this effect
- Choose a heavy font weight (bold or black) so the text reads clearly even partially obscured
- Adjust size, color, and letter spacing
Canva offers shadows, outlines, glows, and lifts in the text effects panel. For the text-behind-image effect, keep effects minimal the depth itself is the visual statement.
Step 3: Duplicate Your Image
This is the key step that makes the layering work.
- Select your image and click the Duplicate icon (or right-click → Duplicate)
- Canva places a copy directly on top of the original
- Keep both images aligned they should sit in exactly the same position
You now have: original image → text layer → duplicate image (from bottom to top).
Step 4: Remove the Background from the Duplicate
This step isolates the subject so the text can sit between the two image layers.
- Select the duplicate image
- Go to Edit Photo → Background Remover
- Canva automatically removes the background, leaving just the subject (person, product, etc.)
- Use the Erase/Restore brush to clean up edges if the automatic removal left artefacts
Note: Background Remover is a Canva Pro feature. If you're on the free plan, you'll be prompted to start a trial or upgrade.
Step 5: Arrange the Layers
Now assemble the final composition.
- The layer order from bottom to top should be: background image → text → subject cutout
- Use Position in the toolbar to send layers forward or backward
- Drag the text behind the subject cutout until it's partially obscured
- Adjust text position so the most readable part of the phrase is visible above or below the subject
This alignment step is where the design comes together. Take time to balance the composition text that's too hidden loses readability, too visible loses the depth effect.
Advanced Tips for Better Results in Canva
Choose the Right Subject Photo
The effect works best with:
- Clean separation between subject and background (avoid busy backgrounds)
- Subject positioned off-center leaves room for text to be visible on one side
- High contrast between subject and background helps the background remover produce cleaner edges
Font Selection Makes or Breaks the Effect
- Condensed display fonts fit more text without overwhelming the subject
- All-caps short phrases (3–5 words) read faster at thumbnail scale
- White or light text on dark backgrounds and vice versa avoid colours that blend with the subject's clothing or skin tone
Platform-Specific Sizing
| Platform | Canvas size | Text placement tip |
|---|---|---|
| YouTube thumbnail | 1280 × 720 px | Keep key text in left two-thirds; YouTube UI covers right edge |
| Instagram post | 1080 × 1080 px | Text centered or bottom-third; subject fills upper two-thirds |
| Instagram Reel cover | 1080 × 1920 px | Large text at top third, subject in center |
| Twitter/X post | 1200 × 675 px | Bold single word or short phrase; subject right-aligned |
| LinkedIn banner | 1584 × 396 px | Subject left, text center-right |
Fix Imperfect Background Removal
Canva's background remover occasionally leaves halos or misses fine details (hair, fur, transparent objects). Use the Erase tool in the Edit Photo panel at high zoom to manually clean edges. For portraits, zoom into the hairline and restore any lost strands.
Canva vs. Text Behind Picture: Which Should You Use?
Both tools produce the text-behind-image effect, but they take different approaches.
| Canva | Text Behind Picture | |
|---|---|---|
| Background removal | Canva Pro only ($15/month) | Free, browser-based |
| Steps required | 5 steps (upload, text, duplicate, remove BG, layer) | 3 steps (upload, type, download) |
| Time for first design | 10–15 min | Under 2 min |
| Privacy | Image uploaded to Canva's servers | Image processed locally in browser never leaves your device |
| Font library | 3,000+ (Pro), ~100 (Free) | 250+ curated display fonts |
| Export quality | High-res (Pro), compressed (Free) | High-res, no watermark (Creator plan) |
| Best for | Full design projects, brand kits, team collaboration | Fast text-behind-image effects, solo creators |
| Price | Free (limited) / $15/month Pro | Free (basic) / $9 lifetime Creator plan |
When to use Canva: You're building a full design multiple elements, brand assets, team members need access, or you want Canva's broader template library.
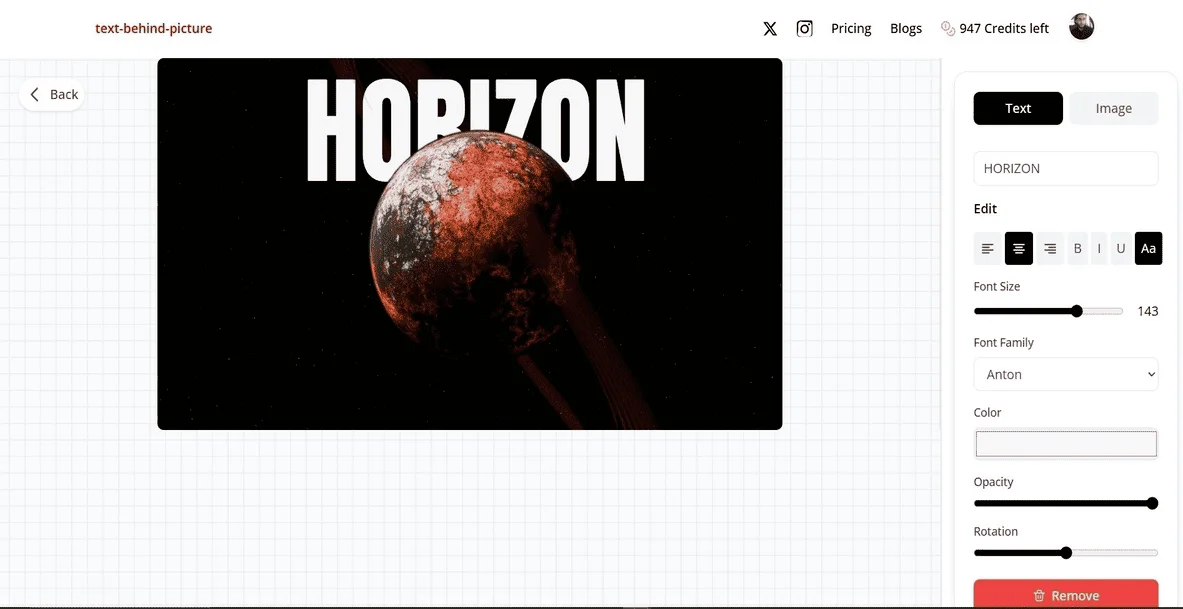
When to use Text Behind Picture: You want the depth effect fast, you upload photos from personal shoots, or you need to batch-create social content without a monthly subscription.
Platform-Specific Use Cases
YouTube Thumbnails
YouTube thumbnails live or die on click-through rate. The text-behind-image effect works here because it signals a face (which triggers social attention), bold typography (which signals a strong topic), and depth (which signals production quality).
Best practice: place the subject's eyes in the upper-center third, run large text beneath, and let the subject's chest or chin overlap the top of the type. Test with 10% zoom to simulate how it looks in a small tile.
Instagram Reels Covers
Reels cover images appear in your profile grid and in the Explore feed. Static depth effects on Reels covers consistently outperform plain screenshots of video stills because they look intentional at small sizes.
Use a single bold word as the text layer "GROWTH", "HONEST", "VIRAL" overlaid by the subject. Keep the background color consistent with your brand palette.
Twitter/X Posts
Twitter's feed moves fast. At standard size, you have roughly 0.3 seconds to stop a scroll. The depth effect adds enough visual complexity that the eye pauses to process it. Keep text to 1–4 words maximum and use a font weight of at least 700 (bold).
Conclusion
The text-behind-image effect is a high-signal design choice it shows intentionality, composition awareness, and production quality without requiring design software expertise.
Canva is the right choice if you want the effect within a broader design ecosystem, have Pro access, and don't mind the 5-step workflow.
Text Behind Picture is the right choice if you want the effect specifically, want to work fast, or prefer not to send personal photos to third-party servers. The free tier covers basic use; the $9 lifetime Creator plan removes the watermark and unlocks 1,000 credits.
Both tools require no Photoshop, no design experience, and no technical background. Pick the one that matches how you work.
Read more
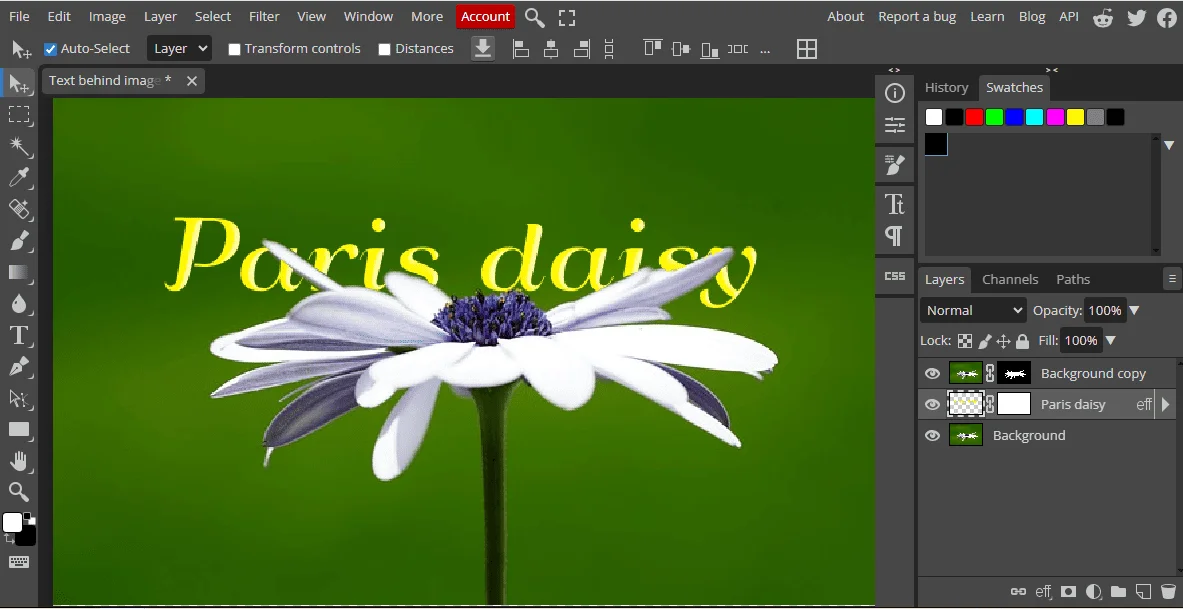
Put Text Behind Image in Photopea Free Online
Learn how to place text behind an object in Photopea, a free online alternative to Photoshop, with this detailed step-by-step guide for beginners.
How to Add Text Behind Images Online Free (2026 Guide)
Create text behind images online for free with Text Behind Picture. No Photoshop needed! Our AI-powered editor automatically places text behind your photos in seconds. Perfect for YouTube thumbnails, Instagram, and TikTok.
Easiest Tool to Put Text Behind Images Free
Why TextBehindPicture.com is the fastest, free way to put text behind objects. Compare it with Canva and Photopea with this in-depth analysis.